In recent years, upcycling has become a popular way to breathe new life into old items, reduce waste, and create a stylish, personalized home. Unlike recycling, which breaks down materials, upcycling involves creatively reusing objects to make them more valuable and functional. Whether you’re a seasoned DIYer or just starting your eco-friendly journey, these five easy upcycling projects will help you refresh your home with charm and sustainability in mind.
1. Turn Old Drawers into Stylish Shelves
If you have old dresser drawers taking up space, don’t toss them out! These can be transformed into rustic wall shelves that add character to any room.
What You’ll Need:
- Old wooden drawers
- Sandpaper
- Paint or wood stain (optional)
- Wall brackets or sturdy hooks
- Screws and a drill
How to Do It:
- Remove the drawers from the dresser and clean them thoroughly.
- Sand down rough edges to prepare for painting or staining.
- Apply a coat of paint or stain to match your room’s decor, or leave them natural for a rustic look.
- Attach wall brackets or hooks securely to the back of each drawer.
- Mount the drawers on the wall with screws, ensuring they’re level.
These upcycled shelves can hold books, plants, or decorative items, adding a unique, eco-conscious touch to your living room, kitchen, or bedroom.
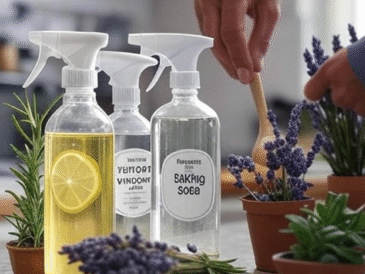
2. Revamp Glass Jars into Chic Storage Containers
Glass jars, whether from pasta sauce, pickles, or jams, are perfect for organizing your home in style. Upcycling jars into storage containers is simple and versatile.
What You’ll Need:
- Clean glass jars with lids
- Spray paint (optional)
- Labels or chalkboard paint for labeling
- Twine or ribbon (optional)
How to Do It:
- Wash and dry jars thoroughly.
- If desired, spray paint the lids or jars to add a pop of color or a matte finish.
- Use labels or chalkboard paint on the jars to mark contents like spices, office supplies, or craft materials.
- Tie twine or ribbon around the neck for an extra decorative touch.
This project keeps your home tidy and reduces the need to buy new storage solutions, making it both practical and eco-friendly.
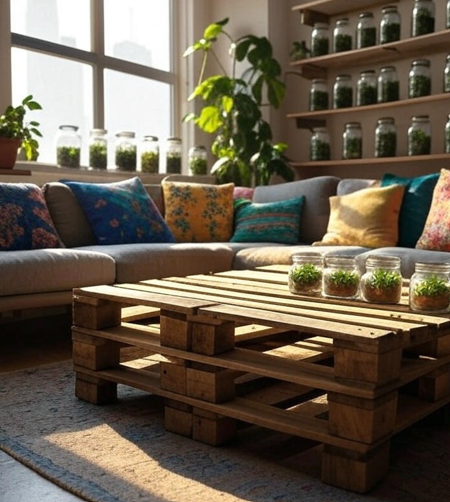
3. Create a Pallet Coffee Table
Wooden pallets are often discarded but make excellent raw material for furniture. With minimal effort, you can craft a rustic coffee table perfect for your living room.
What You’ll Need:
- One or two wooden pallets (depending on desired size)
- Sandpaper or electric sander
- Wood paint or sealant
- Casters (wheels) for mobility (optional)
- Screws and a drill
How to Do It:
- Inspect the pallets for nails or splinters and remove or sand them down.
- Sand the pallets thoroughly for a smooth finish.
- Paint or seal the wood to protect it and enhance the look.
- Attach casters to the bottom if you want your table to be mobile.
- Stack two pallets if you prefer a taller table and secure them with screws.
A pallet coffee table adds a cozy, handmade vibe to your living space while giving discarded wood a second life.
4. Turn Old T-Shirts into a Colorful Rag Rug
Instead of throwing out worn-out T-shirts, upcycle them into a vibrant rag rug for your kitchen, bathroom, or hallway. This project is a fun way to repurpose fabric and add a splash of color.
What You’ll Need:
- Old cotton T-shirts
- Scissors
- Large needle or crochet hook
- Non-slip rug mat (optional)
How to Do It:
- Cut the T-shirts into long strips about 1-2 inches wide.
- Braid or crochet the strips together to form a rug shape of your choice.
- Secure the ends by sewing or tying knots.
- Attach the rug to a non-slip mat to prevent slipping on smooth floors.
This rug project is great for beginners and gives old clothes a stylish, functional second chance.
5. Repurpose Wooden Crates into Storage Cubes
Wooden crates are sturdy and perfect for storage. Whether you find them at flea markets or repurpose shipping crates, they can become elegant storage cubes or shelves.
What You’ll Need:
- Wooden crates (similar size for stacking)
- Sandpaper
- Paint or stain (optional)
- Screws (for stacking)
- Casters (optional)
How to Do It:
- Sand down rough edges and surfaces.
- Paint or stain crates to match your decor.
- Stack crates vertically or horizontally and secure them with screws for stability.
- Add casters to the bottom for easy movement if desired.
Use these crates to store books, toys, plants, or craft supplies. They’re versatile, eco-friendly, and add rustic charm to any room.
Why Upcycling Matters
Upcycling is more than a creative hobby — it’s a step towards reducing waste and lowering your environmental impact. By reusing items you already own or can easily find, you help reduce the demand for new products, cut down landfill waste, and save money. Plus, upcycled items are unique and tell a story, making your home truly one-of-a-kind.
Tips for Successful Upcycling
- Safety First: Always sand rough surfaces and remove nails or sharp parts.
- Plan Your Project: Measure spaces and gather materials before starting.
- Get Inspired: Browse Pinterest, DIY blogs, or local thrift shops for ideas.
- Use Non-Toxic Paints: Choose eco-friendly paints and finishes for healthier indoor air.
- Have Fun: Don’t worry about perfection; the charm of upcycling is in its creativity!
Refreshing your home doesn’t have to mean buying new things. These simple upcycling projects are perfect for beginners and seasoned DIY enthusiasts alike. By transforming everyday objects into stylish and functional pieces, you contribute to a more sustainable lifestyle — one beautiful project at a time.