If you’ve ever wondered how to reduce waste at home while giving your garden a natural boost, composting is the answer. It’s a simple, eco-friendly way to recycle your kitchen scraps and yard waste into nutrient-rich soil that helps plants thrive. Whether you have a sprawling backyard or a small balcony garden, composting can transform your organic waste into “garden gold” — nourishing your plants and reducing landfill contributions.
In this beginner’s guide, we’ll walk you through the basics of composting, how to get started, and tips to make the process smooth and successful.
What Is Composting?
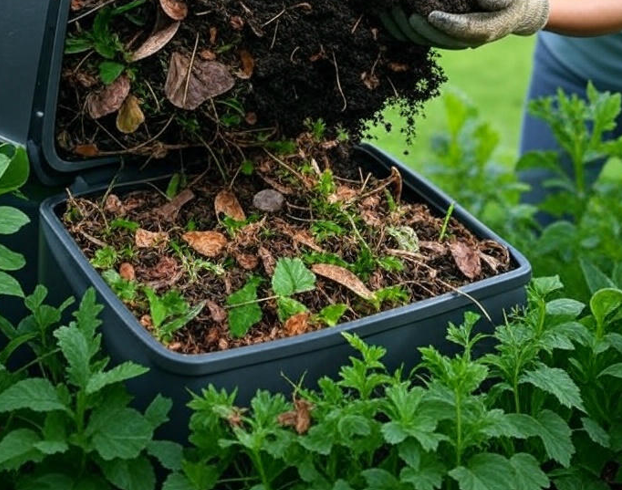
Composting is the natural process where organic materials like food scraps, leaves, and grass break down into humus—a dark, crumbly substance rich in nutrients. Microorganisms such as bacteria and fungi, along with worms and insects, work together to decompose the waste, turning it into a fertile soil amendment.
Using compost improves soil structure, helps retain moisture, and provides essential nutrients like nitrogen, phosphorus, and potassium, making your plants healthier and more resilient.
Why Compost?
- Reduce Waste: Nearly 30% of household waste is compostable. Instead of throwing vegetable peels, coffee grounds, and eggshells in the trash, composting keeps them out of landfills where they produce methane, a potent greenhouse gas.
- Save Money: Compost reduces the need for chemical fertilizers and costly soil conditioners.
- Boost Plant Growth: Compost enriches soil naturally, improving plant growth and yields.
- Help the Environment: By composting, you reduce waste, lower your carbon footprint, and contribute to healthier ecosystems.
What Can You Compost?
Understanding what materials are compostable and what to avoid is key to successful composting.
Compostable Items Include:
- Fruit and vegetable scraps
- Coffee grounds and filters
- Eggshells (crushed)
- Tea bags (check if compostable)
- Grass clippings and leaves
- Shredded newspaper and cardboard
- Plant trimmings and dead flowers
Avoid Composting:
- Meat, fish, and dairy products (attract pests and cause odors)
- Fats, oils, and greasy foods
- Pet waste (can carry harmful pathogens)
- Diseased plants or weeds with seeds
- Synthetic materials like plastic or treated wood
How to Start Composting at Home
1. Choose a Composting Method
- Traditional Compost Bin: A bin or pile in your yard works well if you have space. You can buy ready-made bins or build one yourself with wood pallets or wire mesh.
- Tumbler Composter: A rotating bin that makes mixing easier and speeds up decomposition.
- Vermicomposting: Using worms (usually red wigglers) to break down kitchen scraps in a small indoor bin. Great for apartments or small spaces.
- Bokashi Composting: An anaerobic fermentation process that works even with meat and dairy, but requires a specialized kit.
2. Set Up Your Compost Area
- Pick a dry, shady spot for your compost pile or bin.
- If using a bin, make sure it has good ventilation and drainage.
- Place it near your kitchen or garden for easy access.
3. Balance “Greens” and “Browns”
Compost needs a mix of nitrogen-rich “greens” and carbon-rich “browns” to decompose efficiently:
- Greens: Kitchen scraps, grass clippings, fresh plant trimmings (moist, rich in nitrogen)
- Browns: Dry leaves, shredded paper, cardboard, straw (dry, rich in carbon)
A good rule of thumb is to aim for roughly 3 parts browns to 1 part greens by volume.
4. Add, Mix, and Monitor
- Add kitchen scraps and yard waste regularly, layering greens and browns.
- Turn or aerate the pile every 1-2 weeks to supply oxygen, which helps microbes break down the material faster.
- Keep the pile moist—like a damp sponge—but not soggy. Add water if it’s dry.
Troubleshooting Common Compost Issues
- Bad Odor: Usually caused by too many greens or wet material. Add more browns and turn the pile to aerate it.
- Slow Decomposition: May be due to lack of nitrogen or moisture. Add fresh greens and water as needed.
- Pests: Avoid adding meat or oily foods. Secure the bin with a lid and avoid composting pet waste.
- Pile Too Dry: Add water and fresh greens to restore moisture.
When Is Compost Ready?
Compost is ready to use when it looks, feels, and smells like rich, dark soil—earthy and crumbly with no recognizable scraps. Depending on conditions, this can take anywhere from 2 months to a year.
How to Use Your Compost
- Soil Amendment: Mix compost into garden beds or pots to improve soil fertility and structure.
- Mulch: Spread a layer around plants to conserve moisture and suppress weeds.
- Seed Starting Mix: Blend with potting soil for healthy seedlings.
- Lawn Top Dressing: Spread thinly over your lawn for added nutrients.
Final Tips for Successful Composting
- Chop or shred larger scraps to speed up decomposition.
- Keep a small container with a lid in your kitchen to collect scraps. Empty it regularly into your compost bin.
- Be patient! Composting is a natural process that takes time but rewards you with amazing soil.
By turning your kitchen scraps and yard waste into compost, you’re not only reducing your environmental impact but also nurturing a thriving garden full of life. Start small, stay consistent, and watch your garden flourish with the power of garden gold—your homemade compost!