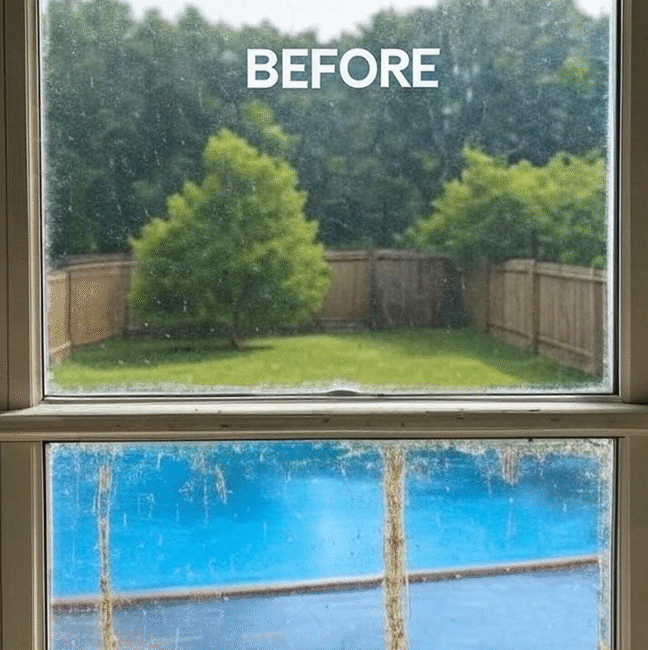
There’s something incredibly satisfying about a clean, streak-free window — the way it lets natural light flood into your home and makes everything feel brighter, cleaner, and more inviting. But if you’ve ever felt frustrated by overpriced, chemical-heavy cleaners that still leave streaks behind, you’re not alone.
That’s exactly what pushed my mom to develop her own homemade window cleaner — a recipe that’s been quietly passed around our family for years and praised by everyone who’s tried it. It’s eco-friendly, budget-conscious, and surprisingly powerful. And today, I’m sharing it with you.
In this post, you’ll learn:
- The heartfelt story behind the cleaner 🌿
- Why it works (science included — don’t worry, we’ll keep it simple)
- How to make it step-by-step
- Why it beats commercial options hands down
- Real testimonials from people who’ve switched and never looked back
- Pro tips to get a flawless finish every time
1. Why My Mom Ditched Store-Bought Cleaners
It all started in our kitchen.
Tired of wasting money on commercial window sprays that smelled like a science lab and left streaks despite the promises on the label, my mom began experimenting. She wanted something simple, gentle, and effective — just like her own mom used to make.
That desire to clean naturally, without harsh chemicals, led her to mix a few everyday ingredients she already had in the pantry. The result? A DIY cleaner that delivered a crystal-clear shine — and that’s been our family’s go-to ever since.
2. The Magic Mix: What’s In the Cleaner?
It’s not magic — it’s just smart chemistry using common ingredients you probably already have at home:
- 1 cup white vinegar – Cuts through grime and grease like a champ.
- 1 cup distilled water – Prevents streaks by avoiding mineral deposits.
- 1–2 drops of dish soap – Helps lift away oils and sticky dirt.
That’s it. No ammonia, no dyes, no synthetic fragrances — just a clean that’s gentle on your home and safe around kids and pets.
3. How to Make It: Step-by-Step Guide
Ready to mix your first bottle? Here’s how:
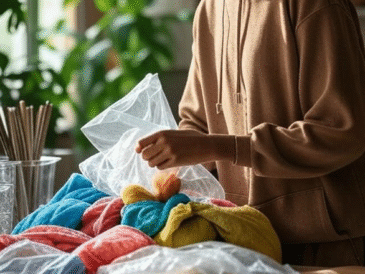
- Grab a clean spray bottle — reuse one if you can!
- Use a funnel (trust me, it’s less messy) to add 1 cup of white vinegar.
- Pour in 1 cup of distilled water.
- Add just 1–2 drops of dish soap — a little goes a long way.
- Screw on the cap and gently shake to mix.
- Spray on glass surfaces and wipe with a lint-free cloth or microfiber towel.
Tip: Avoid using paper towels — they leave lint and sometimes streaks. Go for microfiber instead!
4. Why It Works: A Little Science
Here’s the short and sweet science behind each ingredient:
- White vinegar contains acetic acid, which naturally dissolves grime, water spots, and oily residues.
- Distilled water is free of minerals that can cause streaks — especially important if you have hard water.
- Dish soap is a surfactant — it breaks down oils and helps everything lift cleanly off the surface.
Together, they create a solution that evenly coats, cuts through dirt, and wipes away clean — no fancy chemicals needed.
5. Store-Bought vs. DIY: The Honest Comparison
We’ve tried them all — the big brands, the bargain sprays, the “green” alternatives. And while some work decently, here’s why the DIY version still wins:
| Feature | Store-Bought Cleaner | DIY Cleaner |
|---|---|---|
| Cost per bottle | $3–$7 | Less than $0.50 |
| Harsh chemicals | Often | None |
| Fragrance | Artificial | Neutral or natural |
| Packaging waste | New plastic each time | Reusable spray bottle |
| Effectiveness | Varies | Consistently streak-free |
The verdict? The DIY version is gentler, greener, and just as effective — if not more so.
6. A Win for the Environment
Every time you reuse a spray bottle, you keep one more plastic container out of the landfill. Multiply that by dozens of cleaning products you’ll no longer need, and the impact adds up.
Plus, vinegar and soap are biodegradable. You’re not washing harmful chemicals down the drain — and that’s a win for your home and the planet.
7. Save Money Without Sacrificing Clean
Let’s break it down:
- One bottle of store-bought cleaner: $4
- One batch of DIY cleaner: Less than $0.50
- Annual savings if you clean monthly: Over $40
And that’s just windows. Once you realize how well this cleaner works, you’ll use it on mirrors, glass tables, and even stainless steel — making your cleaning routine both simpler and cheaper.
8. Pro Tips for Streak-Free Results
Want that crystal-clear, no-smudge finish every time? Try these pro tips:
- Clean on a cloudy day. Sunlight dries the cleaner too fast, leaving streaks.
- Use a microfiber cloth or a squeegee — not paper towels.
- Start at the top and work your way down to avoid drips.
- Less is more. A light mist does the job better than a heavy spray.
9. Mistakes to Avoid
Here are a few common pitfalls to steer clear of:
❌ Overusing soap – It can leave a residue. Stick to just 1–2 drops.
❌ Using tap water – Minerals in it can cause streaks. Distilled is better.
❌ Skipping the cloth quality – Use microfiber, not paper towels.
❌ Cleaning in direct sunlight – Wait for shade or a cooler time of day.
10. Bonus: More Than Just Windows
While it was designed for windows, this cleaner is incredibly versatile. Try it on:
- Mirrors
- Glass tables
- Shower doors
- Chrome faucets
- Even stainless steel appliances
It’s a multi-tasking marvel that replaces half the cleaners under your sink.
Final Thoughts: Clean Windows, Clear Conscience
There’s something empowering about making your own household products. You save money, reduce waste, and take control of what comes into your home.
My mom’s DIY window cleaner isn’t just a recipe — it’s a tradition rooted in care, simplicity, and common sense. I hope you give it a try and see just how refreshing it is to clean without the clutter of chemicals.
Let the light shine in — naturally and beautifully.